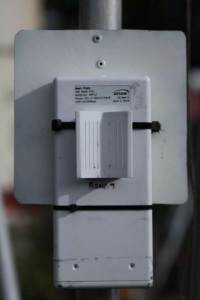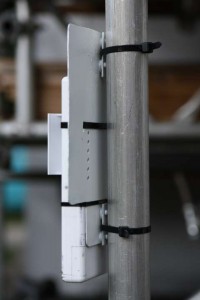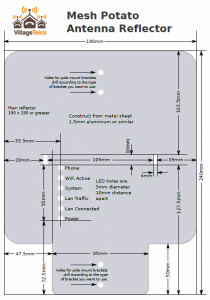
This is a howto from Elektra on building an antenna reflector for your Mesh Potato. Properly attached and deployed it should more or less double the existing range of the MP.
Basic Material
190 x 240mm blank aluminium sheet, 1.5mm thick.
You can use wider than 190mm, if the store sells 200mm wide this is also fine. I recommend to have a professional workshop cut the metal sheet to the outer dimensions. The store where you buy it might do this. They have the tools to easily cut it to a straight form. I did it by hand, it doesn’t look perfectly straight. Doesn’t matter for the function, though.
Tools required
- drill (a drill press preferably, as a hand-held drill tends to slide over the metal, so holes might end up not positioned accurately)
- 5.1mm drill for metal (That is the diameter required for the 5mm rivets)
- white paint
- alcohol as solvent to remove grease from the surface and some old cloth
- cable ties
- some means to cut metal sheet (metal shears might do, but working with 1.5mm aluminium sheet is quite hard)
- four 5x10mm rivets
- rivet gun
- centre punch
- hammer
- a small file
- 4 mm drill
- 2 pieces of flat metal to construct the support brackets
- box cutter / stanley knife
- double sided tape (goes between the MP and the reflector)
- optional: coping saw with metal saw blade (makes it easier to work out the 4x10mm holes)
- hose clips (instead of cable ties for the pole mount)
Steps
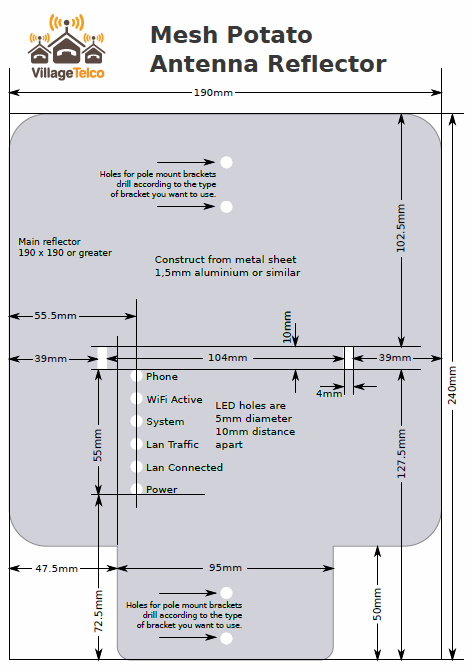
- Print the plan on A4 paper and have a copy shop print it on to transparent foil.
- Use the box cutter to cut the outer shape out of the foil.
- Fix the foil on the metal sheet. Mark the lines to cut.
- With the box cutter, cut the 4x10mm holes (for the cable ties) through the foil and into the metal.
- With the centre punch and the hammer mark the location of the holes.
- Drill holes and cut where indicated.
- Work out the 4x10mm holes.
- Round the outer corners with the file.
- Removed the cutting ridges with the file.
- Remove grease from aluminum plate.
- Spray paint the reflector, leaving plenty of time for the paint to dry.
- Fix the rear mounting support brackets with the rivets.
- Apply the double sided tape between the MP and the reflector.
- Carefully attach the MP to it. Make sure the LEDs match with the holes.
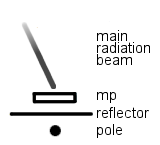
The radiation pattern of the MP with reflector aims ~45 degrees to the left like this:
