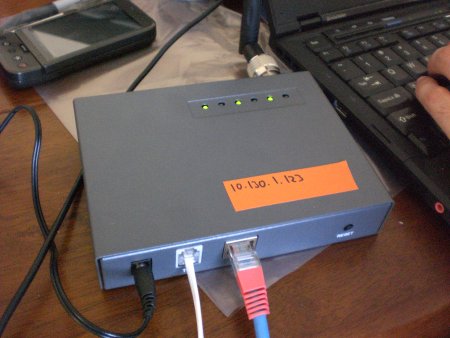
Joel is helping my Village Telco presentation at the upcoming LCA 2010 conference so I took a couple of the first Beta MP01s down to his place for a test drive. They are fresh off the production line and not even calibrated as I needed them in a hurry for LCA 2010. Atcom are currently assembling, testing and calibrating the Betas which will be shipping over the next few weeks.

These early Betas are running revision 203 firmware, which has Afrimesh as the primary GUI with Luci available for “advanced” configuration options. Thanks Elektra and Antoine for your fine work on the Mesh Potato GUI.
Here is Joel’s experience – our #1 Beta MP01 tester! Joel is pretty geeky (he has contributed for several years to the OLPC project) but has never used a Mesh Potato before. I hope this information will be useful for other Beta testers who should be getting their Mesh Potatoes over the next few weeks. I stood back through most of Joel’s beta experience – I wanted to see how other people approach the Mesh Potato.
How Joel Configured His Mesh Potato
- The default Ethernet IP is 192.168.1.20. Joel plugged a cross over Ethernet cable into the MP01, although a regular cable should be OK.
- He then logged in via telnet, and set the password from the command line using the “passwd” command. Setting the password activated ssh and disabled telnet. This password also becomes the web admin password.
- Joel then pointed his browser at 192.168.1.20 and the Web GUI came up.
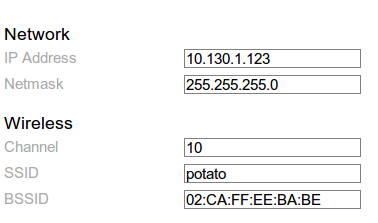
- He changed the 10.130.1.20 “IP Address” to a unique IP on the mesh. Joel selected 10.130.1.123. This is the only change you need to start making phone calls between Mesh Potatoes. This IP address becomes your phone number, for example dialing 123 on the mesh will make Joel’s phone ring. Note this only changes the mesh Wifi IP – the Ethernet IP is still 192.168.1.20. The Ethernet IP can be changed via the Luci Network Menu.

Setting the Wifi IP on the Mesh Potato Note the settings are applied automatically – there is no “save” button, although I understand that this will be present on later firmware as out of habit we all look for a save button! To apply the settings (i.e. change the actual Wifi settings) we rebooted (power cycled) our MP01.
We also changed the Wifi channel and BSSID to match the mesh settings of a couple of earlier Potatoes. This is not really necessary, the default Wifi channel and BSSID are probably OK for you.
That’s it – the main step is just change the mesh Wifi IP to something other than 10.130.20. Then reboot and you can start making calls between Mesh potatoes.
Easier Configuration
A slightly easier way is:
- Point your web browser at 192.168.1.20, login with user/password root/admin.
- Simply change the Wifi IP from 10.130.1.x to 10.130.1.yourchoice.
- Power cycle your potato.
Configuration without a Web browser
- Power up your Potato and connect a phone, after about 1 minute you will get dial tone.
- Dial CONF (2663) and you will hear HAL 9000 talking to you!
- Enter the new Wifi IP, e.g. 10*130*1*123
Joel asked a good question – what do all the LEDs mean? They are not labeled although from memory it’s power/Ethernet/Wifi activity etc. I asked Edwin@Atcom about this and the reason was the vinyl labels hadn’t arrived when the first few betas shipped. The rest of the Betas will have these labels for the LEDs.
